 Save
Save Last spring, I was tasked with bringing dessert to a garden party where nobody wanted anything heavy, and I found myself standing in my kitchen at midnight realizing I'd forgotten to plan ahead. That's when these lemon cheesecake jars saved me—no oven required, just layers of buttery crust, cloud-like filling, and that bright lemon curd that makes your mouth water the moment you see it. I made them in about twenty minutes and stuck them in the fridge, and by the next afternoon, they were perfectly set and honestly stunning in those little glasses. My friend Sarah kept asking for the recipe before she'd even finished hers.
I'll never forget watching my neighbor's face when she took that first spoonful at a potluck last June—her eyes went wide and she immediately asked if the filling was homemade. When I told her it was just cream cheese and whipped cream folded together, she seemed almost disappointed that there wasn't some secret technique involved, but then she came back for seconds anyway. That's when I realized these jars have a kind of quiet charm that makes people overthink how simple they really are.
Ingredients
- Graham cracker crumbs: Use fresh ones if you can—stale crackers make the crust taste a bit papery, and nobody wants that foundation to feel off.
- Unsalted butter, melted: This helps bind the crust together and gives it that toasted, buttery flavor that makes you want to dig in immediately.
- Granulated sugar: A small amount sweetens the crust without making it cloying, which keeps the balance when you layer in the rich filling.
- Heavy whipping cream, cold: Cold cream whips faster and holds its peaks better—I learned this the hard way by using room-temperature cream and ending up with something that looked more like pudding.
- Cream cheese, softened: Room temperature is key here because cold cream cheese gets lumpy and refuses to blend smoothly, creating little pockets of frustration in your filling.
- Powdered sugar: It dissolves faster than granulated sugar and creates a silkier texture throughout the filling.
- Fresh lemon juice and zest: This is where the personality lives—fresh lemon juice has a brightness that bottled juice just can't match, and the zest adds little bursts of flavor.
- Pure vanilla extract: A teaspoon rounds out the flavors without overpowering the lemon, adding warmth to what could otherwise taste too sharp.
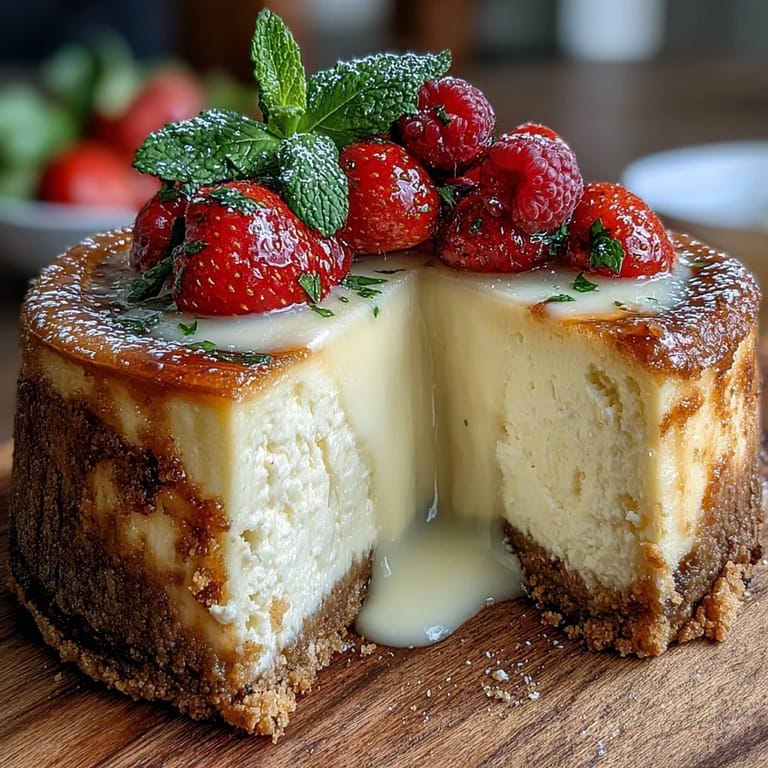
- Lemon curd: This tangy-sweet layer is the crowning moment, so don't skimp on quality here—homemade is incredible if you have time, but good store-bought works beautifully too.
- Fresh berries: Raspberries and blueberries add color, freshness, and a slight tartness that echoes the lemon.
Tired of Takeout? 🥡
Get 10 meals you can make faster than delivery arrives. Seriously.
One email. No spam. Unsubscribe anytime.
Instructions
- Make your crust foundation:
- Combine the graham cracker crumbs, melted butter, sugar, and salt in a bowl and mix until it resembles wet sand—you want everything moistened but still a bit textured. This takes just a minute or two, and that's when you know you're close to done.
- Layer the crust:
- Spoon about two tablespoons of the mixture into each jar and press it down firmly with the back of a spoon or your fingers to create a solid base. This is more important than it sounds because a loose crust will shift around as you add the layers above it.
- Whip your cream:
- Pour cold heavy cream into a bowl and beat it with an electric mixer until stiff peaks form—when you lift the beaters, the cream should stand up on its own. This usually takes three to four minutes depending on your mixer, and it's the moment where the dessert starts to feel light and airy.
- Blend the cheesecake filling:
- Beat the softened cream cheese until it's completely smooth with no lumps, then add the powdered sugar, lemon juice, lemon zest, and vanilla extract and continue mixing until everything is creamy and combined. Don't skip the beating step for the cream cheese alone—it makes all the difference in the final texture.
- Fold in the whipped cream:
- Gently fold the whipped cream into the cream cheese mixture using a spatula, being careful not to deflate all those beautiful air bubbles you just created. You want streaks of whipped cream and filling at first, then fold a few more times until it's almost uniform but still fluffy.
- Fill the jars:
- Spoon or pipe the filling evenly over the crusts, dividing it among all six jars so each one gets the same generous amount. If you have a piping bag, it makes this step look more elegant, but honestly a spoon works just fine.
- Top with lemon curd:
- Add a generous spoonful of lemon curd to the top of each jar, swirling it gently if you want it to look restaurant-ready. This is where the visual appeal really happens, so don't be shy with it.
- Chill until set:
- Cover the jars and refrigerate for at least two hours—this gives everything time to firm up and the flavors time to get to know each other. I usually make mine in the morning and serve them after dinner, which gives them a nice long rest.
- Garnish and serve:
- Just before serving, top each jar with fresh berries and a pinch of extra lemon zest if you want to make them look stunning. This is your moment to make them picture-perfect.
 Save
Save There's something about serving someone a jar of cheesecake that feels more thoughtful than a slice from a plate—like you've given them their own little treasure to unwrap and explore. I made these for my mom's birthday last year, and she kept one in the fridge for three days just to look at before finally eating it, which told me everything I needed to know about how special they felt.
Why Individual Jars Matter
When you serve dessert in a jar instead of on a plate, something shifts in how people experience it—there's an anticipation as they work through the layers, a moment of discovery as their spoon hits the crust, and then that pleasure of the cold, creamy filling. I've noticed people eat these more slowly and deliberately than they would a traditional slice, actually taking time to appreciate the texture contrast. It's a simple presentation choice, but it genuinely changes the eating experience.
The Lemon Factor
Lemon is one of those flavors that can feel either bright and welcoming or harsh and one-note depending on how you use it, and the key here is layering different types of lemon throughout the dessert. You get subtle lemon zest in the filling, bright lemon juice that cuts through the richness, and then that deep, concentrated lemon curd on top that tastes almost jammy. This combination means every bite has the right amount of lemon flavor without ever feeling overwhelming or sour.
Make-Ahead Magic and Storage
The beauty of these jars is that they're actually better when you make them a few hours ahead, giving the flavors time to meld and the layers time to set into distinct, satisfying sections. You can assemble them up to a day in advance and add the fresh berries and extra zest garnish just before serving, which makes them perfect for entertaining when you want to spend more time with guests and less time in the kitchen.
- Cover the jars with plastic wrap or lids so they don't absorb flavors from your fridge or dry out on top.
- They'll keep for two to three days refrigerated, though the crust will slowly soften the longer they sit, which some people prefer.
- Don't freeze these—the whipped cream filling doesn't thaw well and gets watery, so stick with refrigeration only.
 Save
Save These little jars have become my go-to dessert whenever I want something that looks like it took hours but feels effortless to make. There's real joy in watching someone's face light up as they discover all those layers waiting inside.
Recipe FAQs
- → How do I ensure the crust sets well in the jars?
Press the graham cracker mixture firmly at the bottom of each jar to create an even, compact layer that holds together once chilled.
- → Can I substitute the cream cheese with another ingredient?
Mascarpone can be used instead of cream cheese for a richer, creamier texture while maintaining the lemon flavor.
- → What is the best way to get stiff peaks with the heavy cream?
Chill the heavy cream and mixing bowl beforehand, then beat at medium-high speed until firm peaks form without overwhipping.
- → How long should the jars chill before serving?
Refrigerate for at least 2 hours to allow the layers to set and flavors to meld properly.
- → Are gluten-free options possible for this dessert?
Yes, simply use certified gluten-free graham cracker crumbs to accommodate gluten sensitivities.