 Save
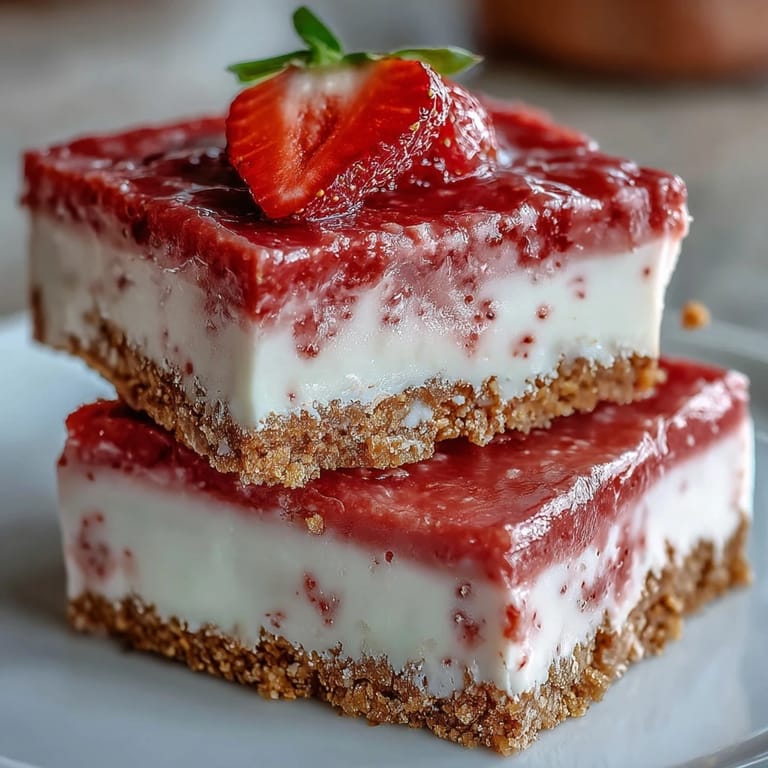
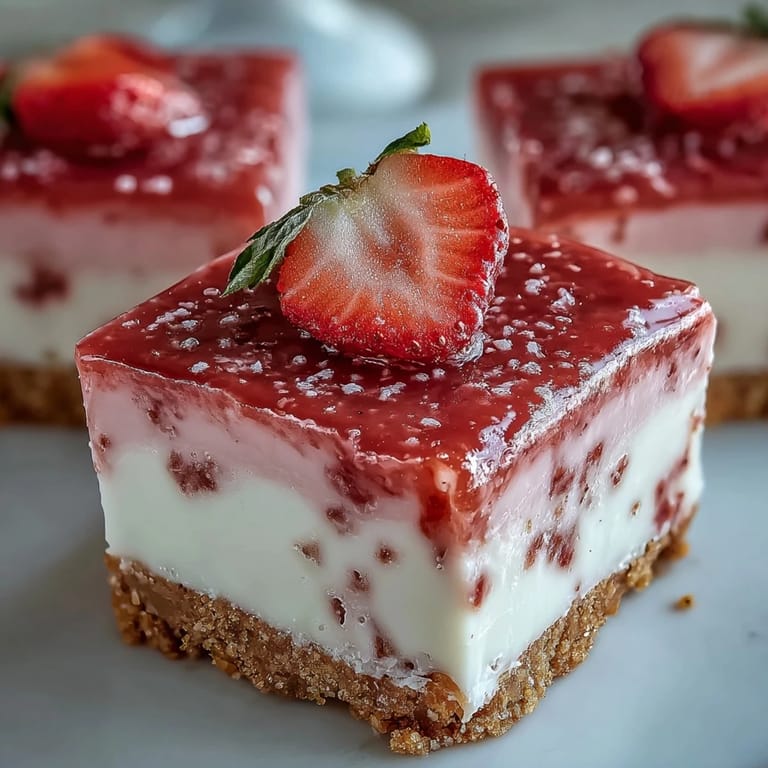
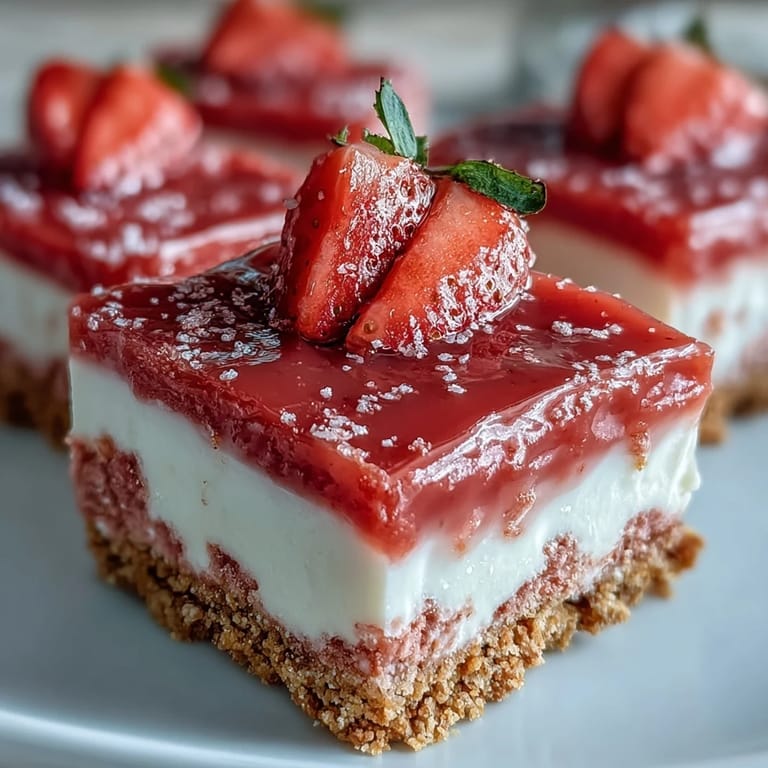
Save My youngest daughter pointed at the strawberry patch and declared she wanted pink dessert, not red. I had half a bag of freeze-dried berries in the pantry and a block of white chocolate that needed using. What started as improvisation turned into these vibrant squares that disappeared faster than anything I'd baked that summer. The combination of tangy berry powder and creamy white chocolate created something unexpectedly sophisticated, yet simple enough to make on a whim.
I brought a batch to a potluck once, and three people asked if I'd ordered them from a bakery. The secret was letting them sit at room temperature for just ten minutes before serving, which gave the fudge a melt-in-your-mouth softness that cold slices never quite achieve. One friend even admitted she'd never liked white chocolate until she tried these. The strawberry powder cuts through the sweetness in a way fresh berries simply can't.
Ingredients
- Digestive biscuits or graham crackers (200 g, finely crushed): The buttery crunch anchors the creamy top layer, and digestive biscuits add a hint of malt that complements the strawberry beautifully.
- Unsalted butter (100 g, melted): Binds the crust together and adds richness without competing with the fudge layer.
- White chocolate chips or chopped white chocolate (200 g): Choose quality chocolate with cocoa butter listed first for the smoothest melt and best flavor.
- Sweetened condensed milk (395 g, 1 can): This is what transforms melted chocolate into true fudge with that signature creamy texture.
- Freeze-dried strawberries (50 g, ground to a fine powder): Grinding them into powder concentrates the flavor without adding liquid that would make the fudge grainy.
- Pure vanilla extract (1 tsp): Rounds out the sweetness and brings all the flavors into harmony.
- Pinch of salt: Balances the sweetness and makes the strawberry flavor pop.
- Pink or red gel food coloring (1 to 2 drops, optional): Enhances the natural blush from the strawberries if you want a more vibrant pink.
- Fresh strawberry slices (optional garnish): Adds a fresh contrast to the rich fudge and signals the flavor at first glance.
- Extra freeze-dried strawberry pieces or coarse sugar crystals (optional garnish): A sprinkle on top adds texture and a little sparkle.
Tired of Takeout? 🥡
Get 10 meals you can make faster than delivery arrives. Seriously.
One email. No spam. Unsubscribe anytime.
Instructions
- Prepare the pan:
- Line a 20 cm square baking pan with parchment paper, leaving a 2 to 3 cm overhang on two sides. This overhang becomes your handles for lifting out the finished fudge.
- Make the crust:
- Combine crushed biscuits and melted butter in a large bowl, stirring until all crumbs are moistened and the mixture holds together when pressed. Press the crumb mixture firmly into the prepared pan in an even layer, then chill in the refrigerator for 10 minutes.
- Melt the fudge base:
- Place white chocolate chips and sweetened condensed milk in a medium heatproof bowl set over a saucepan of simmering water. Stir gently until the chocolate is completely melted and the mixture is smooth.
- Add the strawberry flavor:
- Remove from heat and stir in freeze-dried strawberry powder, vanilla extract, salt, and food coloring if using. Mix until fully combined and the color is uniform.
- Assemble and chill:
- Pour the strawberry fudge mixture over the chilled crust and spread evenly with a spatula to reach all corners. Cover the pan loosely with plastic wrap and refrigerate for at least 2 to 3 hours, or until the fudge layer is firm to the touch.
- Slice and garnish:
- Lift the fudge out of the pan using the parchment overhang, place on a cutting board, and slice into 16 squares with a sharp knife, wiping the blade clean between cuts. Garnish each square with a fresh strawberry slice or extra freeze-dried strawberry pieces if desired, and serve chilled or slightly softened at room temperature.
 Save
Save The first time I made these for my daughter's birthday, she insisted on pink candles to match the squares. Her friends sat around the table in silence, which is the highest compliment a group of nine-year-olds can give. One girl asked if I could teach her mom how to make them. I sent the recipe home in a goodie bag, and it's been passed around their school ever since.
Storing and Serving
These squares keep beautifully in an airtight container in the refrigerator for up to five days, though they rarely last that long in my house. I like to let them sit at room temperature for about ten minutes before serving so the fudge softens just enough to feel luxurious on your tongue. If you're taking them to an event, transport them cold and let them warm up naturally once you arrive.
Customizing the Flavor
You can adjust the strawberry intensity by varying the amount of freeze-dried berries, and I've even swirled in a spoonful of crushed raspberries for a marbled berry effect that looks stunning. For a dairy-free version, substitute dairy-free white chocolate and coconut condensed milk, though the texture will be slightly softer. I've also tried adding a tablespoon of lemon zest to the fudge mixture, which brightened the strawberry flavor in a way that surprised me.
Making Them Look Bakery Perfect
The secret to clean cuts is a sharp knife and patience. I run mine under hot water, wipe it dry, then make one cut and wipe it clean before the next. It takes an extra minute, but the difference between ragged edges and sharp lines is the difference between homemade and professionally made.
- Let the fudge firm up completely before cutting or the layers will smear together.
- Use the parchment overhang to lift the whole slab out in one piece before slicing.
- Garnish just before serving so fresh strawberries don't weep moisture onto the fudge.
 Save
Save There's something deeply satisfying about pulling a pan of these from the fridge and watching them transform into perfect pink squares. They taste like summer, look like celebration, and require nothing more than a little patience and a love for strawberries.
Recipe FAQs
- → Can I use fresh strawberries instead of freeze-dried?
Yes, you can substitute 100g fresh strawberries, puréed and strained. However, freeze-dried strawberries provide a more concentrated flavor without adding excess moisture that could affect the fudge texture.
- → How long do these squares need to chill?
The crust needs 10 minutes to firm up, while the fudge layer requires at least 2-3 hours in the refrigerator. For easiest cutting, chill until completely firm to the touch.
- → Can I make these dairy-free?
Absolutely. Substitute dairy-free white chocolate and coconut condensed milk for the traditional versions. The texture and setting time may vary slightly.
- → What's the best way to get clean cuts?
Use a sharp knife and wipe the blade clean between each cut. For even cleaner slices, run the knife under hot water and dry it before cutting through the chilled fudge.
- → How should I store these squares?
Keep in an airtight container in the refrigerator for up to 5 days. Let stand at room temperature for 10 minutes before serving if you prefer a softer texture.
- → Can I freeze these fudge squares?
Yes, freeze them in a single layer on a baking sheet first, then transfer to an airtight container with parchment paper between layers. Thaw in the refrigerator overnight.